¡Conéctate!
Ven y únete a nuestra comunidad. ¡Amplíe su red y conozca gente nueva!







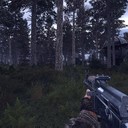





Hola, soy nuevo en la saga y decidi primero jugar shadow of chernobyl y tengo el mismo "problema", quiero jugarlo de la forma mas fiel posible y hasta donde se, si se elige español desde la instalacion, todo el juego estara en español. me vendria bien una recomendacion de algun mod ya que no conozco mucho del tema
Leer Más...
CoD MW4 practice doesn't have to mean jumping into the same kind of match every time. That old routine can waste sessions when you're testing a weapon, learning recoil, or trying to fix one weak movement habit. CoD MW4 Bot Lobbies can give you a more controlled place to work, while normal matches show whether those skills hold up against real players. The useful part is having the freedom to switch between both instead of forcing one mode to do every job.
What Makes Each Match Type Useful?
Bot-focused sessions give you repeatable conditions. You can test a loadout, reset your approach, and work on mechanics without constant pressure.
Normal matches are less predictable. They add human reactions, odd angles, sudden pushes, and team decisions that practice targets can't fully copy.
1 Use Controlled Matches for Weapon Testing
This route suits players who keep changing attachments without knowing what helped. Pick one setup and test it with a clear purpose.
Useful checks include.
• Fire at several distances and watch how quickly the reticle climbs.
• Compare two grips or optics while keeping the same weapon and sensitivity.
• Measure reload timing by repeating the same action from a safe position.
• Test hip-fire and aiming-down-sight control during short movement bursts.
Repeating one action makes small differences easier to notice. If you change three parts of a loadout at once, the result becomes hard to read.
2 Build Core Mechanics Without Extra Noise
Players still learning movement can use a quiet session to focus on one action at a time. It feels less rushed, and mistakes are easier to spot.
Try working through these basic drills.
• Slide, stop, and aim at the same target without rushing the shot.
• Jump around a corner, land, and bring the weapon back under control.
• Switch weapons after a missed burst so the movement becomes automatic.
• Track a moving target while strafing instead of standing still.
These drills won't replace real competition, but they can make your hands more consistent. Keep the session brief so practice stays focused rather than turning into mindless repetition.
3 Enter Normal Matches to Test Decision-Making
Real players are the right choice when your aim feels steady but your fights still go badly. Human opponents force you to read timing, cover, routes, and team pressure.
Watch for these moments during each match.
• Note whether you lose because of poor positioning or a missed first shot.
• Check if you chase damaged opponents into open ground.
• Pay attention to how often enemies appear from an angle you ignored.
• Notice whether your aim falls apart when two players arrive together.
Normal matches reveal habits that controlled practice can hide. Don't judge the whole session by eliminations alone; the location and reason behind each lost fight matter more.
4 Combine Both Modes in One Routine
A mixed routine works well for players with limited playtime. Start with a short mechanical block, then use live matches to see if the work transfers.
A practical session can look like this.
• Spend 10 minutes testing one weapon and one attachment setup.
• Play three normal matches while focusing on one skill, such as close-range tracking.
• Write down two repeated mistakes instead of changing everything immediately.
• Adjust one setting, then repeat the same routine on another day.
This setup gives every mode a clear role. Controlled practice builds consistency, while normal play checks timing, awareness, and composure under pressure.
Which Match Type Should You Choose?
Choose bot-focused sessions for recoil work, loadout tests, movement drills, and repeatable warmups. Choose normal matches for awareness, positioning, target selection, and pressure handling. If you want a guided path that supports the live-match side of your routine, Modern Warfare 4 Boosting can fit beside structured practice, giving you more room to focus on the skills you actually want to improve.
Leer Más...
Building a useful garage in Forza Horizon 6 isn't about owning every shiny car you see. It's about having the right tool when the event changes. A quick road machine, a dependable dirt runner, and something nimble for awkward corners will cover most situations. I've found that a small, well-tested collection beats a huge garage full of cars that never leave the menu, so start by checking the FH6 Cars that match the way you actually drive.
Think About Race Conditions First
Road racing rewards more than raw speed. A car with huge power can look impressive on a straight, then lose half a second at every hairpin. Pay attention to braking distance, steering response, and how quickly the car settles after a turn. If the rear steps out every time you touch the throttle, that impressive rating won't mean much when the pressure is on.
Surface changes matter too. Dirt, wet roads, loose gravel, and uneven shortcuts all expose weak setups. All-wheel drive gives you extra confidence when traction disappears, while sensible tire upgrades can make a modest car feel completely different. Try each vehicle on a route you know well. Familiar corners tell you more than a menu number ever will.
Three Cars Worth Building Around
1. Pick a stable road car for standard circuit races.
2. Keep an all-wheel-drive option ready for dirt events.
3. Add a light car for tight, technical layouts.
Reality check: More horsepower won't save a car that refuses to stop, turn, or put power down cleanly.
A Quick Garage Comparison
Here's the simple split I use when deciding which car deserves upgrade credits. It isn't about strict class ratings. It's about where each type earns its place during a busy festival week.
Car type Best use What to value Common mistake
Road racer Fast paved circuits Braking and corner exit Chasing top speed only
Dirt build Mixed surface events Traction and stability Adding excessive power
Lightweight car Technical layouts Turn-in and balance Braking too late
Don't treat the table as a shopping list. Your driving habits still matter. Some players are smooth and patient, while others attack every curb like it personally insulted them. Pick the car that hides your weak spots instead of making them louder.
Questions Players Usually Ask
Someone recently asked whether an expensive supercar should always replace a slower, easier car in the same class.
Not really. If the slower car lets you brake later and hit exits cleanly, it can be quicker across a full lap.
Another player wondered if every vehicle needs a separate setup for each surface.
Nope. Start with one sensible tune, then change tires, gearing, or suspension only when the route exposes a clear problem.
Spend Credits With a Plan
Before buying another car, look at the ones already sitting in your garage. Better brakes can transform a road build. Proper tires can make a dirt car calmer and faster. A useful differential tune may improve corner exits more than another engine part. Test upgrades one at a time, and run the same route after each change so you know what actually helped. Keep notes if you're serious; even a few words about braking, grip, and steering can stop you wasting credits later. Once your core garage feels dependable, expand around your favourite events rather than chasing collection numbers. If a long week of races leaves you short on time, cheap FH6 Boosting can help you get back to the driving and tuning that make the game fun.
Leer Más...
Trading is less about grabbing the biggest-looking offer and more about knowing what your collection can do next. I've found that browsing GAG 2 Items helps put different item types into perspective, especially when a deal looks exciting but doesn't really improve your position.
Read Demand Before Rarity
Rarity catches the eye, sure, but demand pays the bills. An item can be difficult to obtain and still sit untouched for days if hardly anyone wants it. Meanwhile, a less impressive item may move quickly because players need it for a popular build, task, or collection goal.
Ask yourself a few plain questions before you trade. Who wants this item? How often does it appear in offers? Can you replace it without spending most of your stash? Those answers matter more than a flashy label.
A Quick Pre-Trade Check
When I'm unsure about an offer, I run through the same short check. It takes less than a minute and stops most rushed decisions.
1. Check recent player demand.
2. Compare replacement difficulty.
3. Decide what you gain next.
That last point is easy to miss. A trade can look fair on paper yet leave you with items nobody asks for. Fair value is useful, but practical value is what keeps your collection moving.
Build Three Clear Categories
Keep your inventory organised into three groups: items you're holding, items you're actively seeking, and items you'd move without much thought. You don't need a fancy spreadsheet. A few notes on your phone will do.
Your holding group should contain pieces with steady demand or strong future use. The seeking group gives you direction when browsing offers. The quick-move group creates room for smaller deals and helps you avoid filling every slot with awkward items.
Try not to trade away every useful piece at once. Having two or three solid options left gives you leverage when a better offer appears later.
Use Smaller Deals to Improve Your Position
Huge trades feel exciting, but they're harder to judge. Smaller exchanges are easier to check and easier to recover from if your read on demand was slightly off. Start with one dependable item, then aim for something with either wider interest or better future use.
For example, you might exchange one wanted item for two practical pieces. Keep the stronger one, then use the other in a follow-up deal. You're not chasing a bigger pile for its own sake. You're building a collection that gives you more choices.
Patience matters here. A modest gain repeated several times can beat one dramatic trade that leaves you stuck.
Watch Event Pressure
New content can send demand up fast. Players see a limited reward, panic a little, and start offering far more than they normally would. That can create an opening, but it can also make prices feel detached from reality.
Give the market a little time. If interest stays strong after the first rush, the item may have lasting appeal. If offers cool off within a day or two, you'll be glad you didn't commit your best pieces immediately.
Here's a useful comparison when an event changes the market.
Item signal What it may mean Safer response
Many repeated requests Steady player demand Hold or trade carefully
Sudden high offers Short-term event pressure Wait and compare
Few serious replies Limited practical interest Seek a better fit
Confirm Every Detail
Before clicking confirm, slow down. Read each slot yourself, check the quantities, and make sure the final window still matches the original offer. Chat messages are not enough; people misread things, change their minds, or simply click too quickly.
1. Inspect every item slot.
2. Recheck quantities and names.
3. Confirm only after a pause.
That brief pause is worth it. If anything feels unclear, cancel the trade and ask a direct question. A good deal won't disappear just because you took ten seconds to verify it.
Turn Trades Into a Longer Plan
Good trading isn't about winning every single exchange. It's about making decisions that keep your options open. Track which items receive quick replies, which ones sit for ages, and which offers repeatedly fail to attract interest.
A simple note such as "wanted," "slow," or "event-driven" can improve your judgement over time. You'll start spotting patterns instead of relying on guesswork, and that makes it much easier to price your next offer sensibly.
Keep Some Currency Ready
Don't empty your entire stash in one evening. Keeping spare currency lets you act when a genuinely useful item appears, rather than trying to rebuild from zero. Players who plan around their next move often get more value from the same collection.
If you're comparing cheap GAG 2 Sheckles, think about how the purchase fits your wider trading plan, not just the immediate price. A little patience, careful checking, and room for the next deal can make your progress feel much steadier.
Leer Más...

Saludos kamarada,
¿te refieres a los vídeos de la historia?
Porque la mayor parte del juego es así que yo recuerde jej
Leer Más...
Es un Easter Egg sobre los dibujos animados Kapitoshka.
Más info en www.filmaffinity.com/es/film816427.html
Por lo visto hay varios en toda la Zona de STALKER 2 
Leer Más...
Saludos kamarada,
probablemente ya has encontrado una solución, pero por si acaso.
Shadow of Chernobyl salió multi-idioma desde el primer día, con que deberías poder elegir el idioma sin problemas. ¿Tal vez descargaste alguna versión tipo Misery mod?
Para Call of Pripyat si tenemos stalkerhispano.com/index.php?option=com_...oad&catid=38&cid=442 porque en su momento no estaba claro que fuera a salir en nuestro idioma e hicimos un trabajazo.
Espero hayas podido encontrar tu camino a la Zona y estés disfrutando como loco
Leer Más...
Excellence is pursued at every stage of production—from initial concept to final inspection—reflecting true craftsmanship and delivering a realistic sex dolls that blends classic design with exquisite detail.
These shemale sex dolls exemplifies meticulous attention to detail, blending lifelike facial artistry, elegant proportions, and premium materials to create a refined and sophisticated appearance.
Leer Más...
These choices allow owners to design a sex doll cheap that matches their personal aesthetic rather than selecting from a limited range of standard models. The creative process itself often becomes one of the most enjoyable parts of ownership.
Leer Más...
buenas comunidad, vengo buscando ayuda porque busque y no se donde puedo encontrar lo que busco, soy nuevo en la saga y me descargue el stalker shadow of chernobyl original para empezar pero no esta en español y mi pedido es si alguien sabe de un parche o mod o lo que sea para que este en español, no quiero nada que modifique el juego mas que el idioma para poder disfrutar de este juego que tantos elogios escuche. Les agradeceria si algien me ayuda.
Leer Más...
Pune Realty continues to be one of India's most preferred real estate destinations, offering excellent infrastructure, IT employment opportunities, premium lifestyle amenities, and strong investment potential. Whether you're searching for Premium Homes in Hinjewadi, 3 BHK Flats in Ravet, 2 BHK Flats in Punawale, or Flats in Wakad Pune, the city offers a wide range of residential projects designed to suit every lifestyle and budget.
my home punawale
my home punawale is a premium residential development known for its spacious layouts, quality construction, and modern amenities. The project offers elegant apartments with excellent connectivity to schools, hospitals, shopping centers, and business districts, making it an ideal choice for both families and investors.
Megapolis Circle
Located in the thriving Hinjewadi region, Megapolis Circle has become one of the most sought-after residential destinations. Residents benefit from excellent connectivity to major IT parks, daily conveniences, and recreational facilities, making it perfect for professionals working in Pune's technology sector.
OM Residency
OM Residency provides comfortable living spaces with thoughtfully planned layouts and lifestyle amenities. The project offers a peaceful environment while ensuring seamless access to commercial hubs, educational institutions, and healthcare facilities.
Supreme Towers
Supreme Towers combines luxury, convenience, and superior architecture. Designed for modern families, the project features spacious apartments, landscaped gardens, clubhouse facilities, fitness centers, and children's play areas, creating a complete residential experience.
Hinjewadi Phase 3 – Pune's Growing IT Destination
Hinjewadi Phase 3 continues to attract homebuyers due to its rapid infrastructure development and proximity to leading IT companies. The locality offers excellent connectivity, proposed metro expansion, and strong appreciation potential, making it one of Pune's hottest real estate investment zones.
Excellaa Polaris
Excellaa Polaris delivers contemporary homes equipped with premium amenities and efficient floor plans. The project appeals to professionals seeking comfort, convenience, and excellent connectivity to Pune's major employment centers.
Oxford Golf Estate
Oxford Golf Estate offers an upscale lifestyle with beautifully designed residences surrounded by greenery. Premium amenities, elegant architecture, and a serene environment make this project ideal for luxury homebuyers.
Shangrila Heights
Shangrila Heights features spacious residences with excellent ventilation, stylish interiors, and modern amenities. The project caters to families looking for comfort, convenience, and long-term investment value.
Mont Vert Belview
Mont Vert Belview offers thoughtfully planned apartments with premium specifications, landscaped open spaces, and recreational amenities. Its strategic location ensures smooth connectivity to major commercial hubs.
Kohinoor Woodshire
Kohinoor Woodshire combines nature-inspired living with urban convenience. Residents enjoy spacious homes, modern amenities, and easy access to schools, hospitals, and shopping destinations.
3 BHK Flats in Ravet
The demand for 3 BHK Flats in Ravet continues to grow due to the area's excellent connectivity through the Mumbai-Pune Expressway and expanding social infrastructure. Ravet has become a preferred residential destination for families looking for spacious homes at competitive prices while enjoying excellent appreciation potential.
Premium Homes in Hinjewadi
Premium Homes in Hinjewadi are increasingly popular among IT professionals and investors. With world-class residential communities, smart infrastructure, and direct access to Rajiv Gandhi Infotech Park, Hinjewadi remains one of Pune's strongest real estate markets.
2 BHK Flats in Punawale
2 BHK Flats in Punawale offer an excellent balance between affordability and premium lifestyle. The locality has witnessed remarkable growth due to improved road connectivity, educational institutions, shopping centers, and proximity to Hinjewadi and Wakad.
Flats in Wakad Pune
Flats in Wakad Pune continue to attract homebuyers because of their excellent connectivity, vibrant social infrastructure, metro accessibility, and proximity to major IT corridors. Wakad remains one of the safest long-term residential investments in Pune.
TEJ ONE
TEJ ONE offers premium apartments featuring modern architecture, spacious layouts, and thoughtfully designed amenities that support contemporary urban lifestyles.
CODENAME: 1 PRESIDENTIAL
CODENAME: 1 PRESIDENTIAL delivers luxury residences with premium specifications, exclusive amenities, elegant interiors, and sophisticated living spaces designed for discerning homebuyers.
Advitiya Luxury
Advitiya Luxury focuses on providing world-class residential experiences through premium construction quality, designer interiors, and lifestyle-focused amenities.
Della Racecourse
Della Racecourse represents ultra-luxury living with exceptional architecture, exclusive facilities, and a premium location that caters to buyers seeking refined lifestyles.
KOHINOOR ROYALE TOWERS
KOHINOOR ROYALE TOWERS is one of Pune's premium residential developments, offering spacious homes, modern amenities, landscaped surroundings, and excellent connectivity. The project combines luxury with everyday convenience, making it a preferred destination for families and investors alike.
The Roots
The Roots emphasizes green living by integrating open spaces, landscaped gardens, sustainable planning, and premium residential amenities, creating a balanced lifestyle for modern families.
NAVYAM
NAVYAM offers stylish homes designed with modern architecture, functional layouts, and premium community amenities. It caters to buyers seeking comfort, elegance, and long-term investment value.
VIVANTA NEST
VIVANTA NEST provides thoughtfully designed residences featuring spacious interiors, modern facilities, and a peaceful living environment suitable for families of all sizes.
Nivaan Meadows Phase 3
Nivaan Meadows Phase 3 combines modern lifestyle amenities with well-planned residential spaces. The project emphasizes greenery, community living, and easy connectivity to Pune's major commercial destinations.
YASHADA DREAMSONG
YASHADA DREAMSONG offers quality homes with attractive amenities, landscaped open areas, and a family-friendly environment that enhances everyday living.
Kingsbay
Kingsbay is designed to offer premium residences with elegant architecture, superior construction quality, and lifestyle amenities that meet the expectations of today's homebuyers.
108 Astera
108 Astera features contemporary homes with spacious layouts, premium specifications, and excellent connectivity to Pune's growing residential and commercial hubs.
Land Of Dreams
Land Of Dreams delivers a balanced lifestyle by combining modern apartments, open green spaces, recreational facilities, and convenient access to schools, workplaces, and shopping destinations.
Namrata Breezio
Namrata Breezio offers beautifully planned residences equipped with modern amenities, quality construction, and thoughtfully designed community spaces for comfortable urban living.
The F Rows
The F Rows presents exclusive residential options with elegant architecture, premium specifications, and well-planned community infrastructure, making it a preferred choice for homebuyers seeking both luxury and convenience.
Why Invest in Pune Real Estate?
Pune remains one of India's fastest-growing residential studio apartment pune markets due to continuous resale flats in pune infrastructure development, expanding metro connectivity, growing IT employment, and increasing demand for quality housing. Areas like Hinjewadi, Wakad, Punawale, Ravet, Baner, Balewadi, and Tathawade continue to deliver strong appreciation potential while offering excellent quality of life.
Leer Más...

HOGAR Y AVENTURA
Que lindo que es estar de nuevo en casa
Estuve lejos y lejos tambien incluso estando cerca
Me aventure por ahi escapando y por obligacion
Haciendo el caminito, claro, descubri y acepte la autoridad
de las consecuencias de mis actos
Entonces de ahi la obligacion jajaajajjjjjj
Decepcione a mucha gente qzue vio en mi algo Bueno, muy Bueno.
Fuerte, Resistente, Incansable.
No es zque no me rinda nunca o que solo quiera
Abrazar la vanidosa VICTORIA de esta carne.
Vanidosa y hermosa por ser momentanea
Lo unico qzue quiero es seguir y seguir
Bueno tambien muy bueno para la Bohemia, el vicio ya saben
Esto ultimo a quienes no lo consideran algo bueno.
Llegue hasta el Monolito despues de aplicar una voluntad Epica para llegar hasta el
No le pedi nada, ningun deseo, teniendo todo seria como muy cobarde de mi parte
Asi zque descendi abri azquella puerta que Fantasma me ayudo a Hackear con dispositivo
Creado por el y luego entre para descubrir la verdad el qui de la cuestion
Voluntad Epica
Si solo quiero seguir y seguir volver a despertar y solo saber qwue tengo que Matar al TIRADOR
Una vez mas y otra y otra.
Seeee un REMAKE me vendria muuuy BIEN...BD
Queridas Hermanas y Queridos Hermanos Stalkers les recomiendo estos Relatazos de Radiophobia que son muy muy buenos.
Salu222
L t B I T f
eT He oDyEs t hE LoOr
Leer Más...
Hola de Nuevo Hermano. Me xfxije bien en la imagen que subiste. Te envia varias veces el mensaje de/ la ssiguiente direccion de destinatario a fallado. Sale varias veces pero al final te dice tu mensaje a sido publicado correctamente. Osea que lo envio. Nos vemos Che
Salu222
LtBITf
Leer Más...
Hola Ezeee!!! Como Estas Hermano Cnel Ezeqzuiel? Disculpa que me tardara en responder. Es una Alegri zque vuelvas a la Zona jeje. Che Dale voy a descargar en instalar Discord y charlamos por ahi. Voy a buscar a Dade por FB. Debe de estar muy ocupado viciando a S.T.A.L.K.E.R. jaja!!
Bendiciones Hermano Ezeuiel
Salu222
LtBITf
Leer Más...
Still undecided on your class? The Gates of Ahn'Qiraj open July 10—ready to compete for the Black Qiraji mount? "Classic Plus" rumors are exploding across X and YouTube, while WoW Classic 20th Anniversary Gold remains a hot topic as players prepare for upcoming content. Plus, how did a boss die in just 6 seconds? This quick update covers today’s biggest WoW news and whether it’s better to hoard or sell.
WoW Classic 20th Anniversary Gold
1.
Leer Más...
1. Dying Instantly at the Start or Clutching a Win?
Do you often get ambushed right after entering a dungeon, struggle to find good loot, or lose every team fight instantly in Dark and Darker (Dark And Darker Gold, boosting, service)? Why do some players extract fully geared while others die within minutes? The difference is not pure mechanical skill—it’s about gear choices, information awareness, and extraction timing. This guide breaks down a real high-intensity match into simple principles so you can survive longer and play smarter in chaotic fights.
2. Early Game: Survive First, Deal Damage Later
At the start, your priority is not fighting—it’s becoming **faster and harder to kill**.
Key ideas:
* Immediately upgrade movement speed and armor
* Replace weak gear without hesitation
* Prioritize anything that improves survival
In short: If you can’t escape or survive, you can’t play the game.
3. Looting Strategy: Don’t Bet on One Room
Progress depends on RNG, but smart players don’t rely on luck.
Key points:
* Prioritize large chests (weapons, accessories)
* Rotate between multiple loot routes
* Don’t obsess over a “perfect loot room”
Core principle: **Efficiency beats luck.
4. Combat Awareness: Sound Matters More Than Aim
High-level players don’t just react fast—they gather better information.
You must:
* Use footsteps to estimate enemy numbers
* Confirm kills before pushing forward
* Delay fights when multiple teams are present
Simply put: One wrong read can ruin the entire run.
5. Team Play: Roles Decide the Outcome
Winning is not about individual damage—it’s about structure.
Typical roles:
* Frontline: Fighter / Barbarian
* Ranged: Damage support
* Support: Cleric healing and revival
Core idea: Space control matters more than mechanics.
6. Extraction Decision: Survival Over Greed
In the late game, you face a critical choice:
* Keep fighting → higher risk, higher reward
* Extract → safe and consistent profit
Experienced players agree:
Extracting alive with loot is always better than dying for more gear.
7. Conclusion: Who Is This Guide For?
Best suited for:
* New players who die frequently
* Players struggling in chaotic fights
* Anyone unsure when to fight or escape
What you gain:
* Higher survival rate
* Fewer unnecessary deaths
* More consistent loot extraction
8. Pro Tip
In multi-team fights, don’t be the first to engage. Wait for enemies to weaken each other, then clean up—the win rate difference is massive. If needed, some players also consider options like buy Dark and Darker Items or use a boosting service to improve their progression, but the core strategy of timing and patience remains the most important factor in winning fights.
9. Core Benefits by Player Type
* Beginners: survive longer and reduce early deaths
* Intermediate players: improve decision-making and fight timing
* Advanced players: maximize efficiency and extraction consistency
Leer Más...
Siiii, yo no sé como se llama Dade en las redes sociales, estamos complicados che jaja
Hermano, te dejo mi contacto de Discord, venía al foro a contarles algo copado de Stalker, si querés charlamos por ahí!
Discord: eze_32_echo
Leer Más...
COMUN
LUNAS EN LAS QUE HICIMOS JAURIAS PODEROSAS INSTINTIVAS CON QUE LAS CREAMOS EL TERRITORIO EN EL QUE MANDAMOS.
EL ASUNTO ES QUE DESPUES DE ESOS ENFRENTAMIENTOS CON LOS DOS PATAS. TENIAMOS RIVALIDADES ENTRE NOSOTROS
POR VER QUIEN QUEDARIA AL MANDO Y LAS COSAS NO TARDABAN EN TENSARSE ASI QUE APRENDI MUCHO DE AQUELLO
ESTABA ATENTO SIEMPRE PASANDO DESAPERCIBIDO
EN ESTA OCASION TRES DE ELLOS LLEGARON LOS ESPERABAMOS Y ELLOS LO SABIAN BIEN. IBA A SER UNA PELEA
POR EL TERRITORIO.
NUESTRO GRUPO ERA SIMPLE, SIETE INTEGRANTES. LES SALI AL PASO ELLOS YA HABIAN ENVIADO SUS DOBLES O TRIPLES SEGUN SU LUNAJE
PODIAN MULTIPLICARSE MAS DE 3 VECES ALGUNOS. SUS MENTES NOS ATACABAN. SE ABALANZARON SOBRE MI VARIOS DE ELLOS. LOS PERCIBI
POR MI OIDO Y MI OLFATO. SU ENERGIA ES DIFERENTE...ME REFIERO A LAS PROYECCIONES MENTALES DE SI MISMOS...GUAU!!! ASI QUE
ESQUIVO TODOS LOS QUE PUEDO SALTO CERCA DE UNA ANOMALIA Y LA ESQUIVO.
DOS DE ELLOS CAEN EN LA TRAMPA Y DESAPARECEN Y VUELVEN A APARECER.
CUANTAS PROYECCIONES DE ELLOS TRES!
QUERIDOS NO TENGO NI PERRA IDEA, VARIOS MAS QUE MI JAURIA. ASI QUE LOS TRES REALES ESTAN TAN ENTRETENIDOS ATACANDOME A MI
QUE SE OLVIDARON DE LOS OTROS SEIS DE LOS MIOS, QUE LES SALTARON ENCIMA DOS A CADA UNO.
ELLOS SON PODEROSOS, LES ATACAN Y HIEREN, UNO DE ELLOS ES MORDIDO, SUJETOS POR EL CUELLO Y UNA DE SUS PATAS POR ANOMALIA Y GAMMA
A QUIENES LES AYUDO A REMATAR.
ALPHA Y BETA POR SU PARTE SE ARREGLARON BIEN SOLOS. ELIMINANDO AL SEGUNDO ELLOS
CONOZCO A ESTOS CANS ALGUNA VEZ PELEAMOS HOCICO CON HOCICO Y A NO SER QUE HALLAN HECHO SU PROPIA MANADA. NO SON LOS MAS PODEROSOS DE LA MANADA QUE
YO CONOCI. HISTORIAS DETRAS DE LA HISTORIAS QUE DAN FORMA A ESTA HISTORIA GUAU GUAU GUAU!!! MUAJAJAJAAA!!!
EL ULTIMO TIENE A UNO DE LOS NUESTROS.
VCACHORROV, NUESTRO QUERIDO Y AMADO VCACHORROV AGARRANDOLO FUERTE CON SUS FAUCES DEL CUELLO.
LA LIDER DE NUESTRA JAURIA QUE HABIA DEJADO QUE VCACHORROV PELEARA SOLO PARA QUE APRENDIERA DECIDIO QUE YA ERA SUFICIENTE Y SALTA SOBRE EL TERCER Y ULTIMO PRESA xD
MORDIENDOLE FUERTE EL CUELLO. EL MALDITO AGUANTA ASI QUE ME LANZO CONTRA EL Y ENTIERRO MIS COLMILLOS HASTA AL FONDO TAMBIEN EN SU CUELLO GRU;NENDO SALVAJE. MIENTRAS LA
LIDER GRU;NE Y APRETA CON SUS FAUCES HASTA QUE LE ARRANCAMOS LA CABEZA A AQUEL CABRON QUE TERMINO SOLTANDO EL CUELLO DE NUESTRO CACHORRO.
ESTABA COMPLICADO PERO NO ERA NADA QUE NO SE PUDIERA SANAR CON TIERRA Y ALGO DE AGUA DE LLUVIA ACIDA.
ERA JOVEN Y TENIA QUE APRENDER A DEFENDERSE MEJOR. TENIA QUE DESARROLLAR SUS HABILIDADES OTROS HABRIAN MUERTO CON UNA MORDIDA DE ESA CLASE DE MUTANTES
PUDIMOS VER QUE SU CUERO Y PELAJE RAN MUY RESISTENTES ESO LO SALVO. ERA DURO DE CUERO MAS QUE NOSOTROS
PRONTO ESCUCHAMOS LOS RUIDOS FUERTES DE ESAS COSAS DE PATAS COMO LA LUNA LLENA QUE GIRAN Y DE LA QUE BAJAN LOS HUMANOS Y SUS RUIDOSOS.
PODEMOS PERCIBIR MUCHAS COSAS DE DIFERENTES MANERAS. SUS FORMAS Y TAL O SU LEJANIA. SABEMOS COMO HUELEN EN SUS MAQUINAS, SU COMBUSTIBLE
EL RUIDO DE ESO GRANDE QUE LLEVAN DENTRO Y QUE LOS HACE FUNCIONAR. EL OLOR A SANGRE, SUDOR, LAGRIMAS...MIEDO Y ESE POLVO QUE LLEVAN DENTRO LOS
RUIDOSOS SUS ARMAS COMO LES LLAMAN ELLOS. ADEMAS OTROS POLVOS BD POR LOS QUE SUELEN PELEAR TAMBIEN. SABEMOS DE SOBRA SUS INTENCIONES.
SENTIMOS HASTA SUS CORAZONES. CUANTO MAS LUNAS PASAN MAS APRENDEMOS DE LO QUE SEA...
GUAU GUAU GUAU GUAU!!!
UN BUEN TRATO CON LOS RENEGADOS. UN TRATO QUE SE DIO DE MANERA NATURAL DESPUES DE TANTO TIEMPO DE CONVIVENCIA CON ELLOS
Y ELLOS CON NOSOTROS. TENIAMOS NUESTRAS CRIAS EN... NUESTRA Y SU MADRIGUERA. SI, NOS AYUDABAMOS, NO ERAN NUESTROS AMOS
SOLO DEFENDIAMOS NUESTRO TERRITORIO. NOS IDENTIFICABAN Y NOS LLAMABAN CON SUS NOMBRES HUMANOS PERO NOSOTROS NOS LLAMABAMOS A NUESTRA MANERA
EN PERRUNO. A NUESTRA LIDER LE DECIAN BLANQUITA.
ESTO ERA ALGO NUEVO DE HACE POCAS LUNAS. ASI QUE AQUELLOS BANDIDOS, QUE ERAN COMO LOS RENEGADOS LE LLAMABAN. ESTABAN EN DESVENTAJA.
RAPIDAMENTE LLEVAMOS A CACHORRO DETRAS DE UNOS ARBUSTOS Y LE TAPAMOS CON TIERRA CERCA DE LA ANOMALIA DE ANTES, YA QUE LE PROTEJERIA,
ADEMAS LE DEJAMOS UNA BUENA PATA DE LA CAZERIA.
EL RESTO NOS ENCAMINAMOS A LA MADRIGUERA DE LOS RENEGADOS. UN MONTON DE ESAS MIERDAS QUE HACEN CON ARBOLES. NOSOTROS LLEGAMOS A PERCIBIR SUS
FORMAS POR EL OLFATO Y EL TACTO ADEMAS DE POR LOS OIDOS. OIMOS TODO LO QUE NOS RODEA LAS ROCAS LOS ARBUSTOS LOS ARBOLES. LOS LUGARES VIEJOS Y
HABITADOS POR COSAS QUE LOS HUMANOS NO PUEDEN VER Y QUE ESTAN HAY. ALGUNOS DE ELLOS LES PERCIBEN PERO CREEN QUE ES PARA NORMAL Y PARA NOSOTROS ES
LO MAS NORMAL.
ASI QUE MOVIMOS NUESTROS HOCICOS CON PRECISION. DE NINGUNA MANERA DEJARIAMOS QUE DA;NEN A NUESTRAS CRIAS. SOLO EL HABER VENIDO A INVADIR
NUESTRO TERRITORIO LES COSTARIA. NO IBAN A SALIR NINGUNO DE ELLOS DE ALLI.
BAJARON DE SU MIERDA Y UNO DE ELLOS, MIENTRAS LOS DEMAS AVANZABAN POR EL CAMINO, SE QUEDO ARRIBA DE SU MIERDA EN LA PARTE TRASERA CUBRIENDOLOS CON UNO DE ESOS
ASUNTOS SUYOS RUIDOSOS Y PELIGROSOS QUE LLEVAN A TODAS PARTES.
FUE EL PRIMERO EN CAER POR BLANQUITA QUE SE LE ACERCO SILENCIOSAMENTE Y SALTO ENCIMA JUSTO EN SU CUELLO DERRIBANDOLO. YO POR MI PARTE LE MORDI
LA MANO DEL RUIDOSO. PARA QUE NO LO HUSARA NI POR CASUALIDAD. OSEA AVECES LOS HUSAN AL CAER ,ACCIDENTAL, NO QUERIAMOS ALERTAR A SUS COLEGAS.
EL ALTO ALLA ARRIBA SE LLENO DE AGUA, DE ENERGIA. EMPEZARON A ZONAR SUS ENERGIAS RUIDOSAS Y PODEROSAS. LLOVIA, CUBRIENDO NUESTROS PASOS.
UNO DE LOS RENEGADOS TIRO UNA GRANADA AL CAMINO DE ACCESO. UN ESTRECHO CAMINO. ESOS BANDIDOS NO HABIAN PENSADO BIEN LO QUE HACIAN.
Y VARIOS SE DISPERSARON ESCONDIENDOSE DETRAS DE ROCAS Y ARBUSTOS SIN DARSE CUENTA DE QUE HAY ESTABAMOS NOSOTROS ESPERANDOLOS. CAZANDOLOS ENSEGUIDA
EN SILENCIO.
ALGUNOS DE LOS BANDIDOS GRITAN LLAMANDO A LOS SUYOS REVELANDO SU POSICION. Y ANTES DE QUE MI JAURIA Y YO HICIERAMOS NADA. LOS RENEGADOS CON MAS LUNAS
LES ATACAN CON SUS RUIDOS ELIMINADOLOS DESDE LEJOS. AL RESTO QUE SALE DE SUS ESCONDITES HUYENDO LOS ATACAMOS ENTRE TODOS SOMETEMOS ALGUNOS, OTROS
RECIBEN LOS RUIDOS DE LOS RENEGADOS Y CAEN.
TENGO A UNO DEL CUELLO LISTO. EL LIDER DE LOS RENEGADOS SE ACERCA. MI PRESA ES LA ULTIMA QUE QUEDA NO LO MORDI CON TODO SOLO LO TENGO DEL CUELLO.
RENEGADO ME HACE LA SE;NA SONORA, UN SILBIDO, PARA QUE LO SUELTE MIENTRAS LE PONE SU ACERO FILOSO EN LA CARA. SUS COMPA;NEROS SE ACERCAN LEVANTAN AL
HOMBRE Y SE LO LLEVAN A SUS MADRIGUERA. EL LOBO NO PERDONA Y MUCHO MENOS A UNA PRESA...BUENO DEBO SER EL UNICO QUE SABE QUE EL SABE PEDIR PERDON Y
PERDONAR...
RENEGADO Y YO NOS QUEDAMOS ESPECTANDONOS UNOS INSTANTES.
LISTO ME VOY A BUSCAR A CACHORRO CON BLANQUITA. EL RESTO DE LA JAURIA SE VAN CON LOS RENEGADOS A LA MADRIGUERA MIENTRAS
ALGUNOS DE ELLOS REVISA LAS PRESAS PARA VER QUE LES SERIA UTIL DE TODO LO QUE LLEVABAN EN SUS CUEROS. YA SABEN ESAS COSAS QUE LLEVAN COLGANDO DE LA
ESPALDA.
A CACHORRO LO PERCIBO VIENE HACIA NOSOTROS ASI QUE COMO EL NOS PERCIBE SABE A DONDE VOY CON BLANQUITA Y ALLI NOS ENCONTRAMOS. TOMAMOS LO QUE MAS NOS
SIRVE DE LA CAZERIA CONTRA LOS LOBOS MUTANTES. LOS QUE LOS STALKERS LLAMAN PSEUDOPERROS.
ESA ES MI VIDA POR AHORA YA ESTUVE EN VARIOS LUGARES PERO AHORA ESTOY AQUI. ESTABLECIMOS UN TERRITORIO. APRENDIMOS QUE LOS RENEGADOS SON MAS LEALES QUE
MUCHOS DE LOS NUESTROS Y OTROS HUMANOS O STALKERS.
COMO LES DIJE ANTES LOS STALKERS NOS LLAMAN, NOS PONEN NOMBRES Y A MI ME SUELEN LLAMAN HIJO DE PERRA Y SE RIEN SE ALEGRAN. NO SE BIEN PORQUE ES COSAS
DE HUMANOS.
PARA MI JAURIA SOY LLAMADO Y CONOCIDO COMO COMUN. SI, UN PERRO CIEGO DE LA ZONA COMUN Y CORRIENTE.
ES HORA DE COMER BAJO LA LLUVIA ACIDA DE LOS PANTANOS.
xD
SALU222
LtBITf
Leer Más...
Hola Hermano si yo ahora no puedo borrar los Spams asi que algo no correcto estas pasando. Hay que buscar a Dade en FB e informarle de la Situation jajaja xD
DADEEEEEEE!!!!!!!
Salu222
LtBITf
Leer Más...
Ey! como andas!!! tanto tiempo siiiii
Intenté mandarle un mensaje a Dade pero da error el foro diciendo que hay un problema con los correos jajaja
Leer Más...
 La Zona